Add a table
To insert a table on your page, click the "Table" tab then choose the option "Insert table with column and row headings."*
*You want to choose this option because it will make your table accessible to non-sighted visitors, or anyone using a screenreader.
Now, run your mouse over the grid to select the number of columns and rows you want in your table.
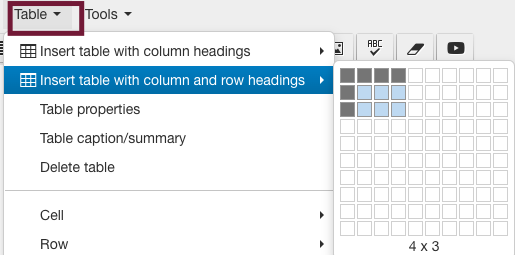
In the example above, the table would have 4 columns and 3 rows.
It would look like this:
| Column 1 | Column 2 | Column 3 | Column 4 |
|---|---|---|---|
| Row 1 | |||
| Row 2 |
To fill in your table cells, simply click into a cell and start typing.
Your table will automatically fill the width of your page without you having to resize it. Your table is also automatically responsive on all devices. This is why the maximum table size is 10 x 10.
| Weekdays | Saturday | Sunday | |
|---|---|---|---|
| Store Hours | 9 - 5 | 10-5 | closed |
| Kiosk Hours | 9-5 | closed | closed |
To ensure your table is accessible, use a caption.
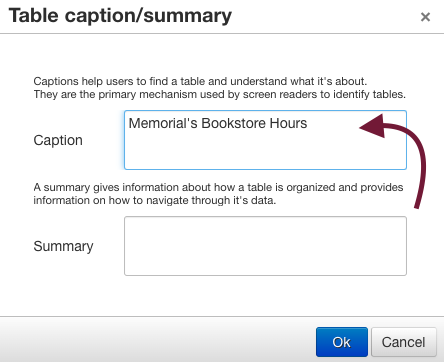
In order for your table to be read properly by a screenreader to a non-sighted reader, you must use a table caption. To do so:
- Click on your table to highlight it.
- Then click "table" in your editor.
- Then choose "Table captions/summary."

Give your table a caption; a caption is simply an explanation of what the table is communicating to readers.
The summary field is optional. Use it if you have a complex table that needs an explanation. For example, a table showing scientific data might have a summary to explain the correlation between different figures in the table.
Don't forget to save, approve, and publish your changes so they appear on your website.