Create an event
To create new events:
Locate your "Events Listing" section folder. This is where you will create and store your events. Once you've located your Events Listing folder, click directly on it:

Y0u will be taken to your Events Listing section editor.
To add a new event:
- Click the “content” tab
- Click the green “+ Add content” button:

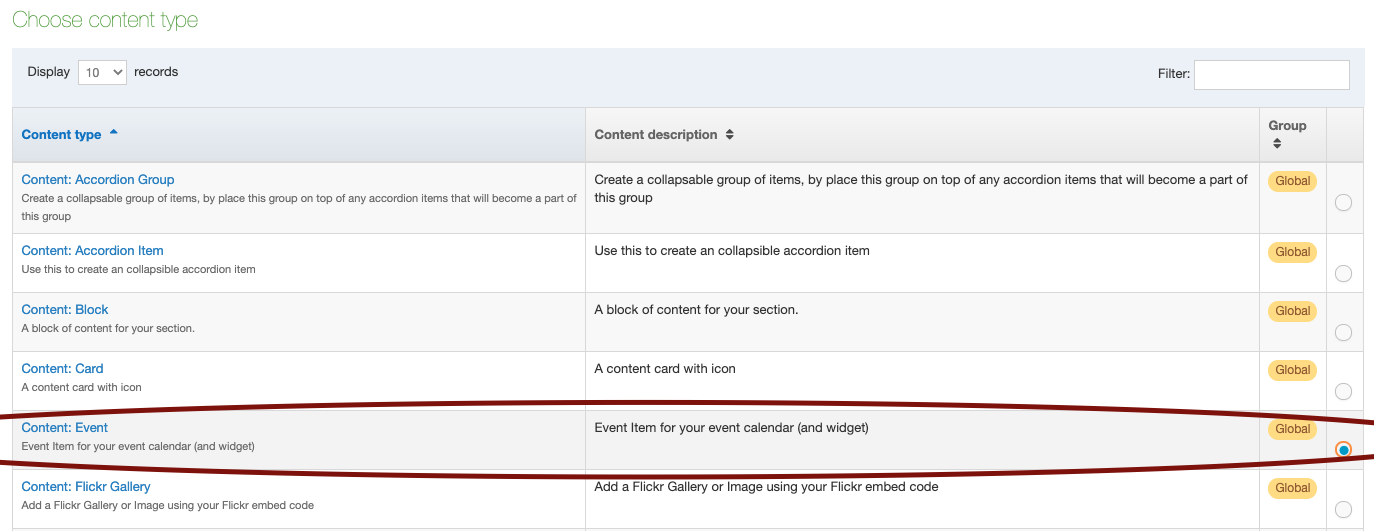
From the “Choose Content Type” screen, locate the “Content: Events” content type.
Select this option by clicking in the empty circle across from it. Then, click the green “next” button.
From there you will be taken to the event editor screen to create your event:
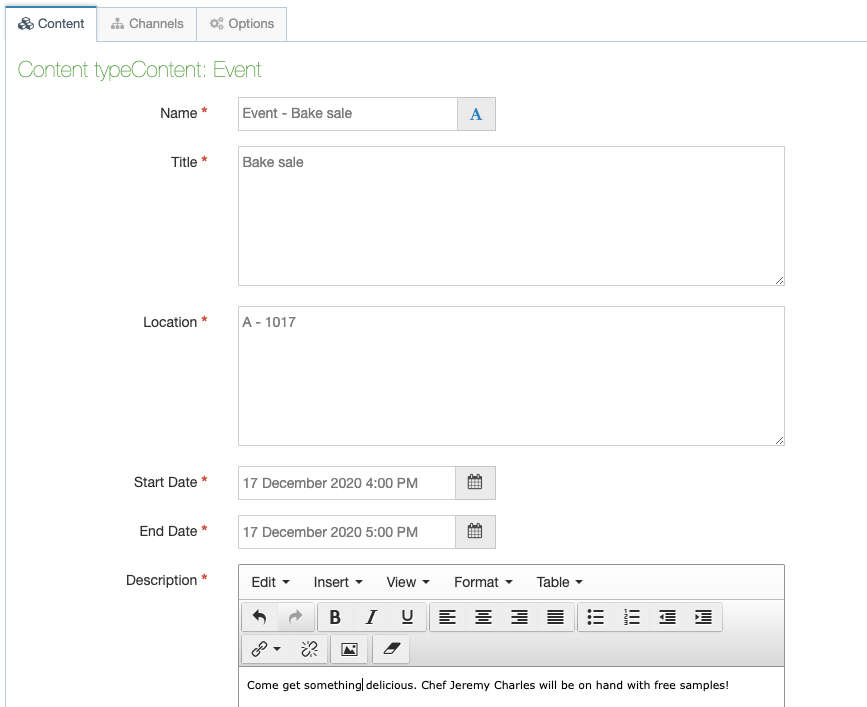
How To Fill in the Fields:
- Name: You should name your event as follows: Event - [title of your event]
- Title: Type the name of your event as you want it to appear in your widget.
- Location: Type in the location of the event.
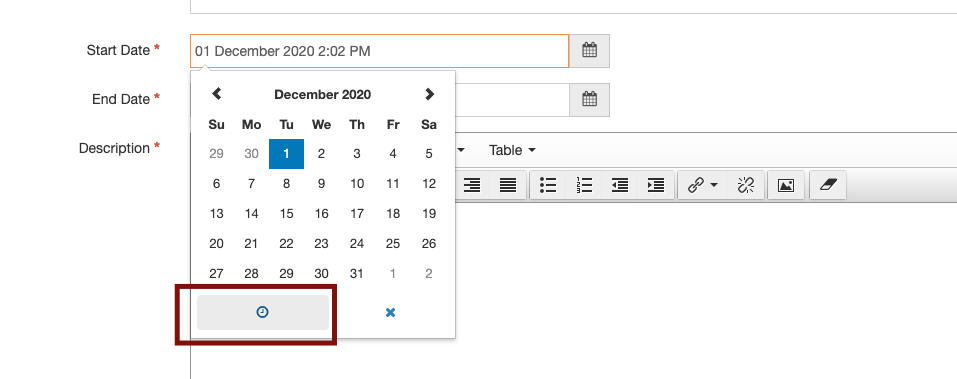
- Start Date / End Date: Click in the empty field and use the calendar picker to select the date your event will begin and end.
NOTE: You also set the TIME in this field, by clicking the little clock icon:
- Description: Type a short description about your event. List the who, what, and why information that will entice a crowd to attend your event.
- Event URL: This is optional. If you have an event website or Facebook event page you want to link to, copy and paste your link into this field.
To publish your event:
If you are a contributor, click save changes and ask a site moderator to approve and publish your new feature.
If you are a moderator, save and approve your changes, then save changes to the section, and publish branch on the homepage.